Hello World Project
Learn the basics of using React Native for Unreal Engine in your project.
On this pageInitialize the JavaScript project
Now that we have everything set up and ready, we can create a simple hello world project.
Initialize the JavaScript project
Start by creating a new
rnueJavaScript project:npm create @rnue/app@latest hello-worldThe initializer asks you to choose a starter:
Minimal (TypeScript)(default): React Native for Unreal onlyMinimal (JavaScript): React Native for Unreal onlyExpo Web + RNUE: One React tree for the browser and Unreal
This guide uses the default
Minimal (TypeScript)starter. It creates a new folder calledhello-worldcontaining the basic boilerplate for your app:- App.tsx
- .gitignore
- .npmrc
- app.json
- babel.config.cjs
- index.ts
- metro.config.cjs
- package.json
- tsconfig.json
Run the metro development server
While working on the project, you will use a development server to serve your JavaScript code to
rnuein Unreal Engine. Start it by running:npm run startThe terminal shows the following output:
> hello-world@0.0.1 start > react-native start Welcome to React Native v0.86 Starting dev server on http://localhost:8081 (the Metro logo, drawn in block characters) Welcome to Metro v0.84.4 Fast - Scalable - Integrated INFO Dev server ready. Press Ctrl+C to exit. INFO Key commands available: r - reload app(s) d - open Dev Menu j - open DevToolsAdd a React surface to your Unreal Engine project
This step assumes some basic familiarity with the following Unreal Engine concepts:
If you are new to these concepts, take some time to familiarize yourself with them before continuing.
Now we have a running development server ready to serve our JavaScript code to Unreal Engine, let's add a React surface to our Unreal Engine project.
Create a new level and widget blueprint
We will start by creating a new level and a widget blueprint.
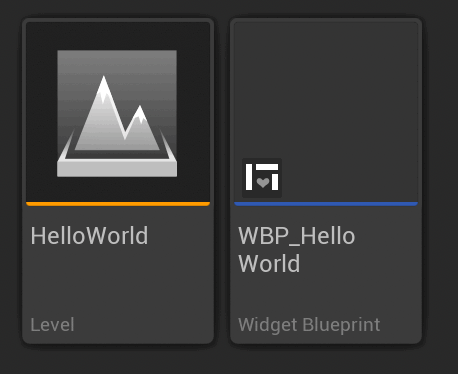
Fig. 3.1Create a new level and widget blueprint Add a React surface to the widget blueprint
Then, we will add a React surface to the widget blueprint in the widget blueprint editor.
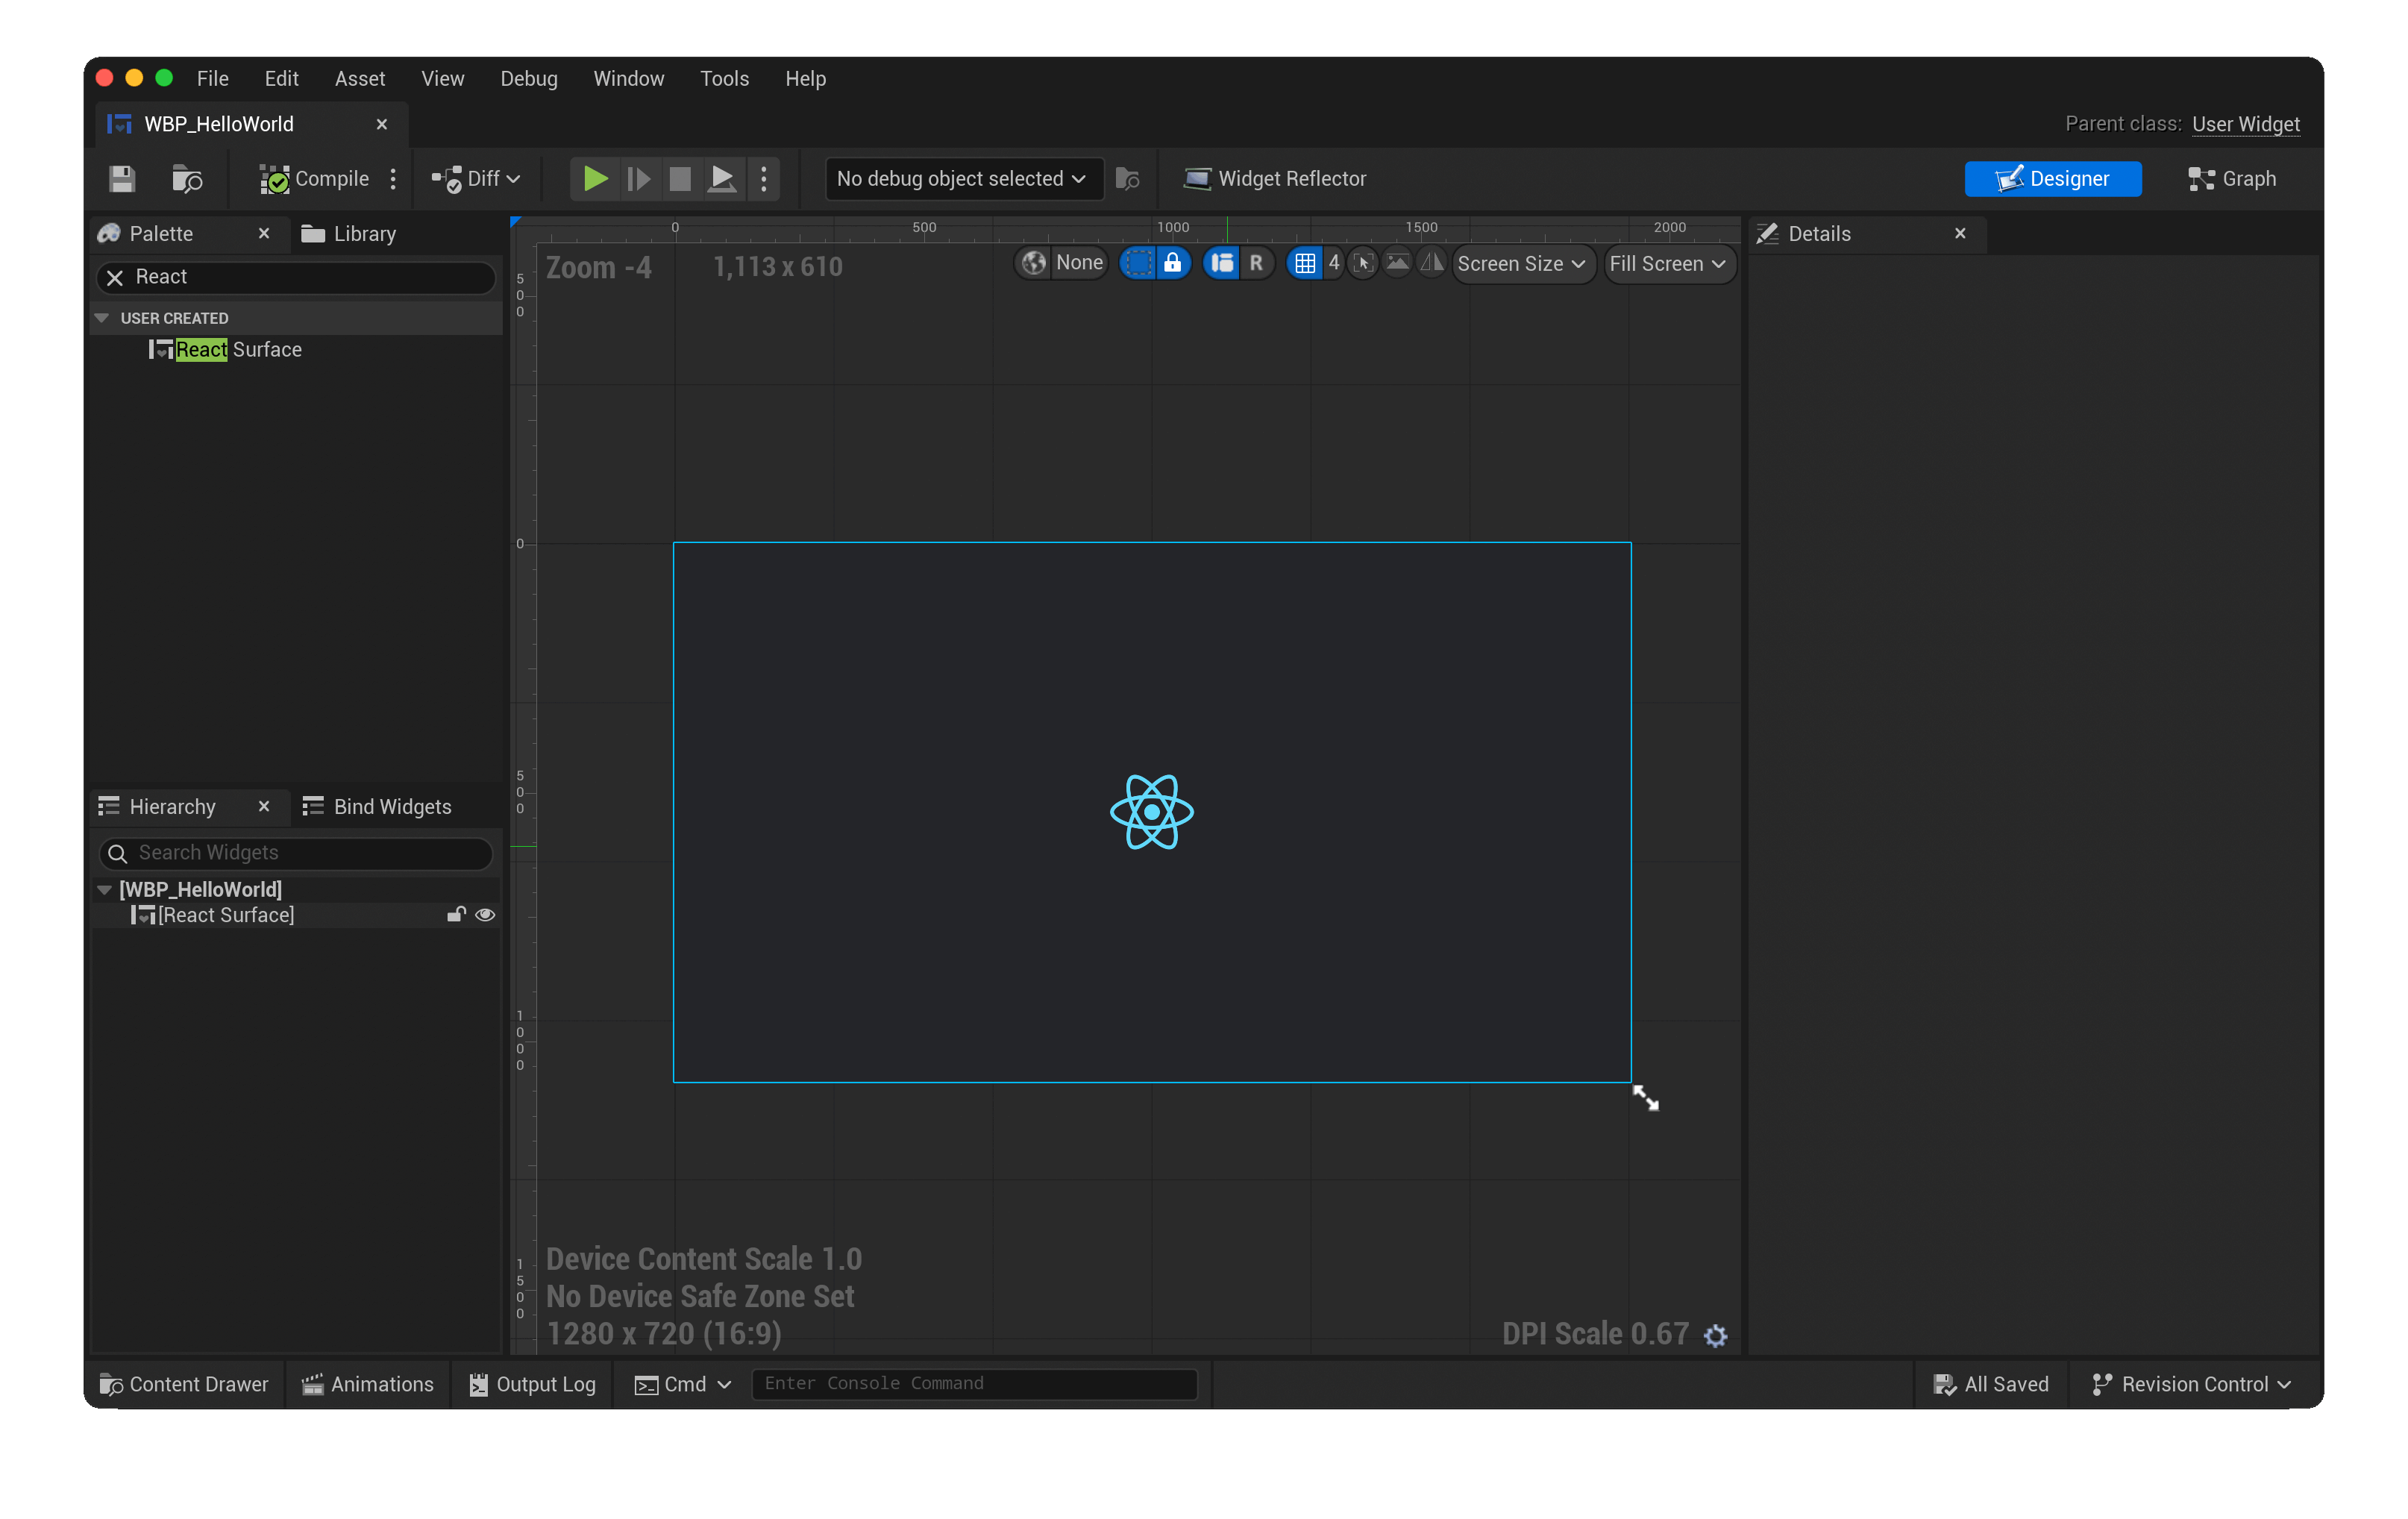
Fig. 3.2Add a React surface to the widget blueprint Show the widget blueprint on screen
To show the widget blueprint, we will add some simple logic to the level blueprint that creates it adds it to the viewport.
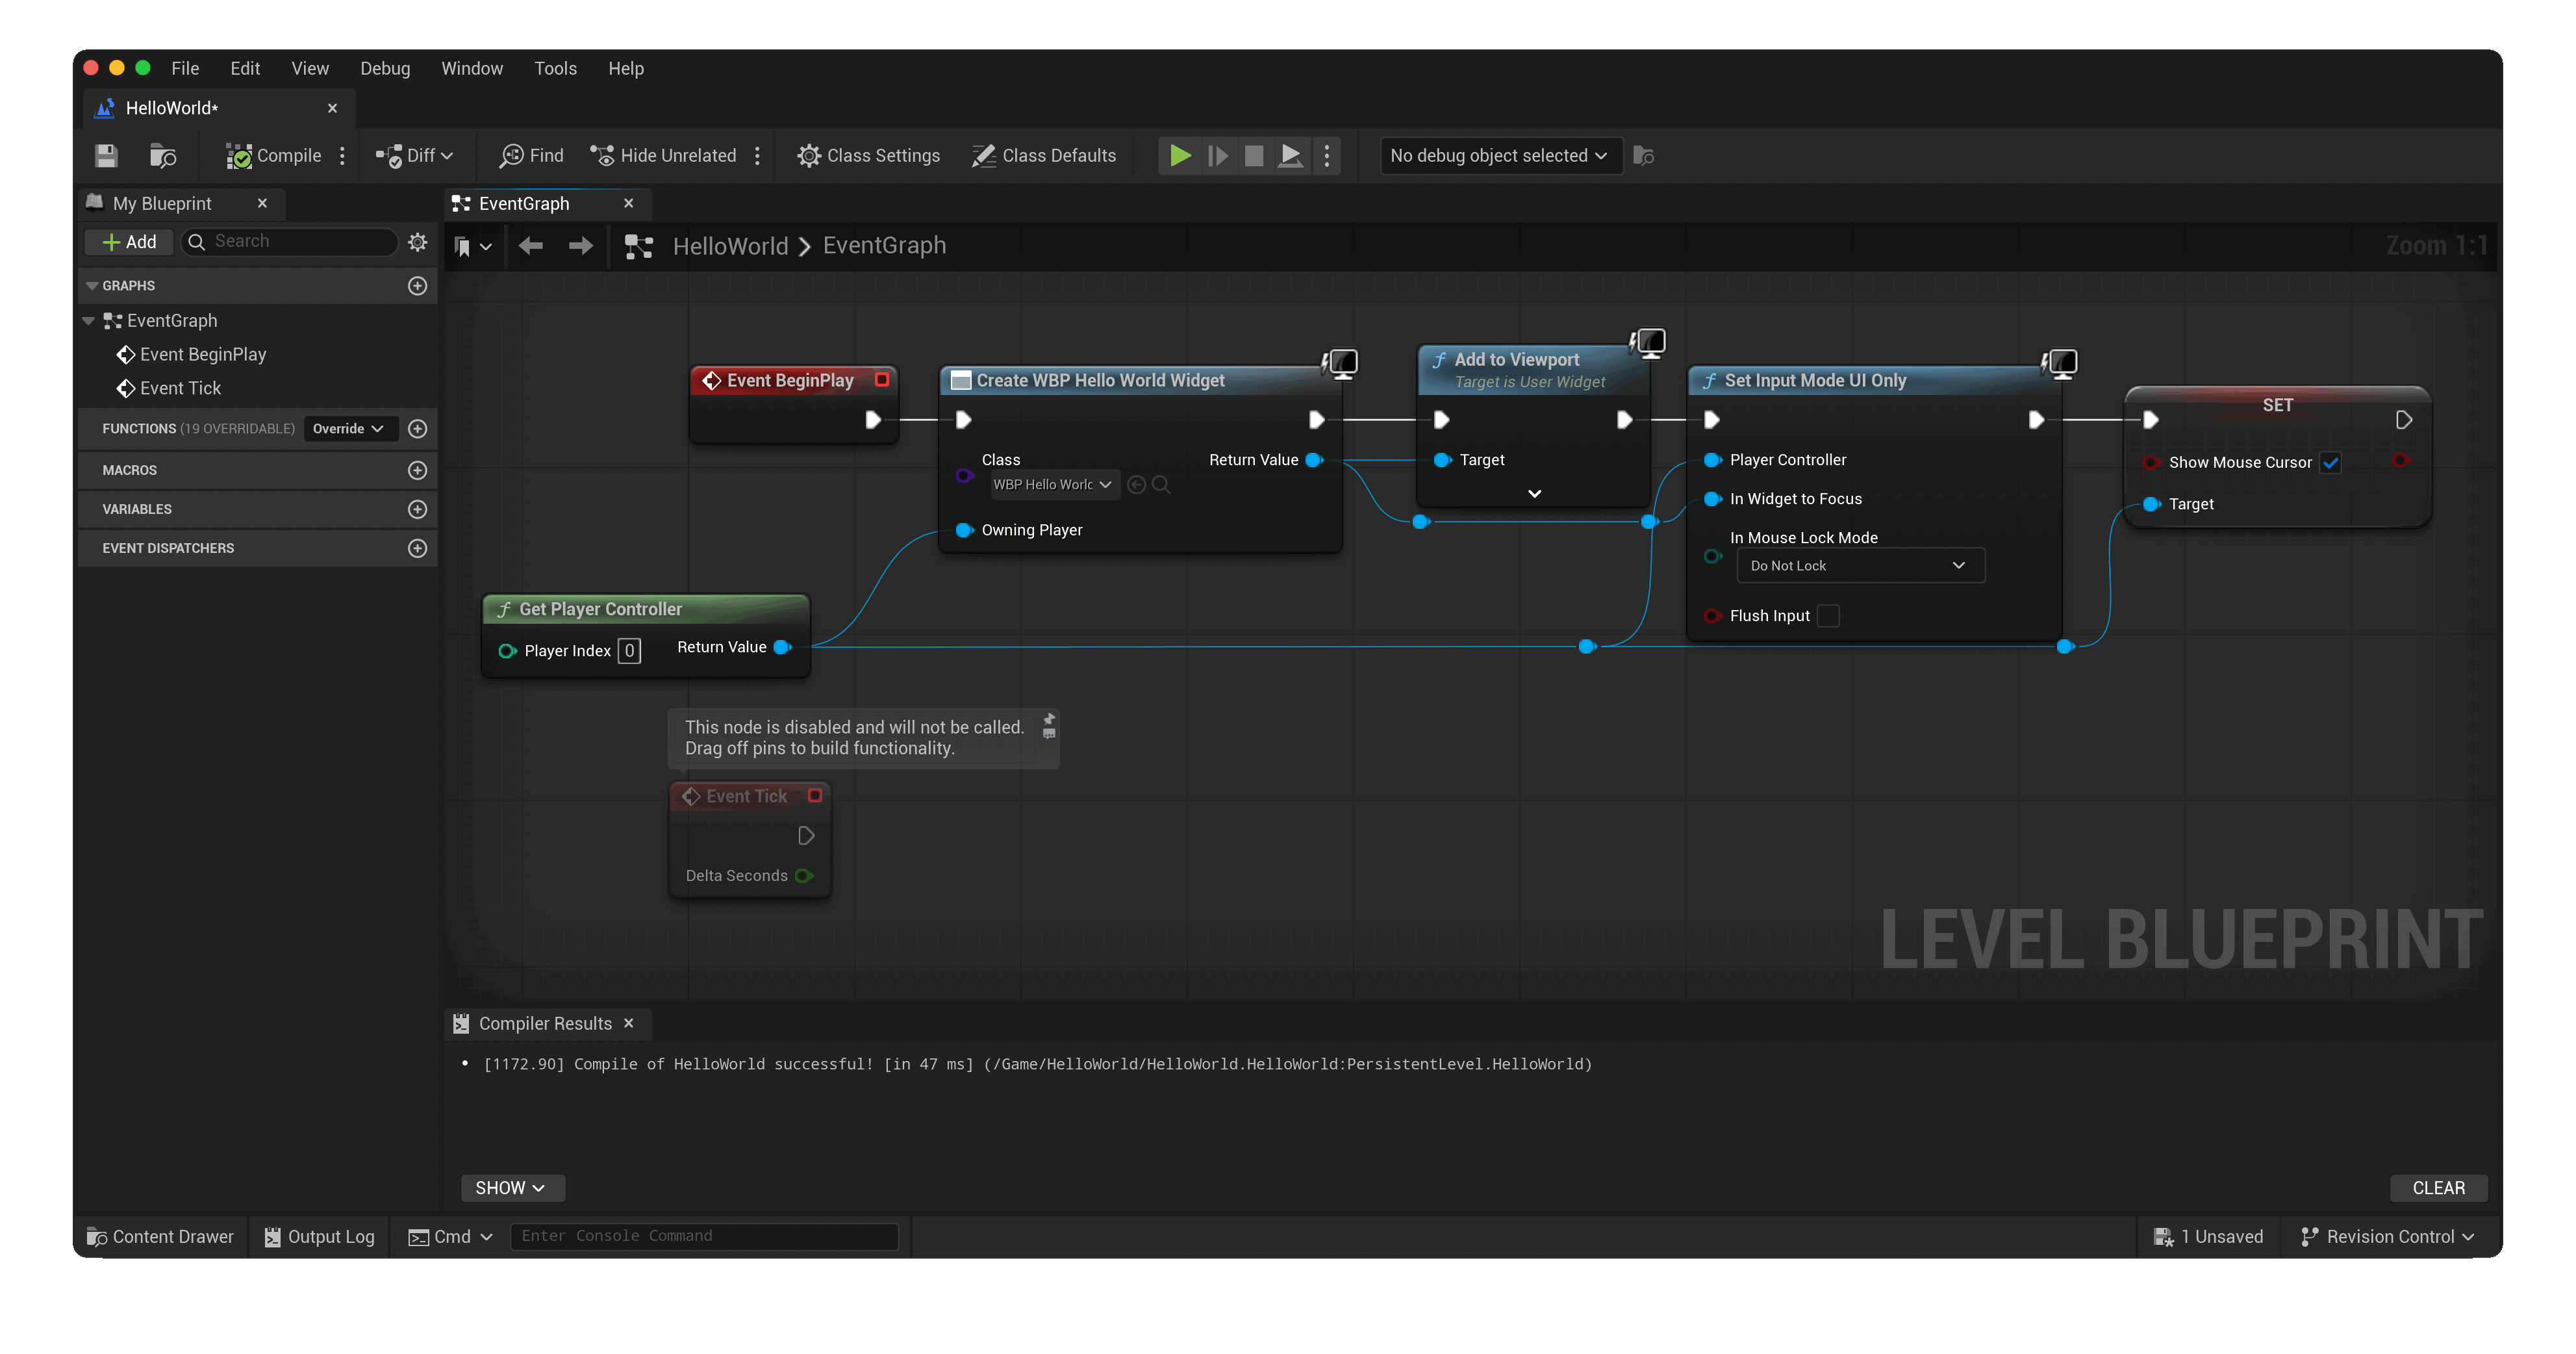
Fig. 3.3Show the widget blueprint on screen Run the game
You can now run the game and see the React surface in action!
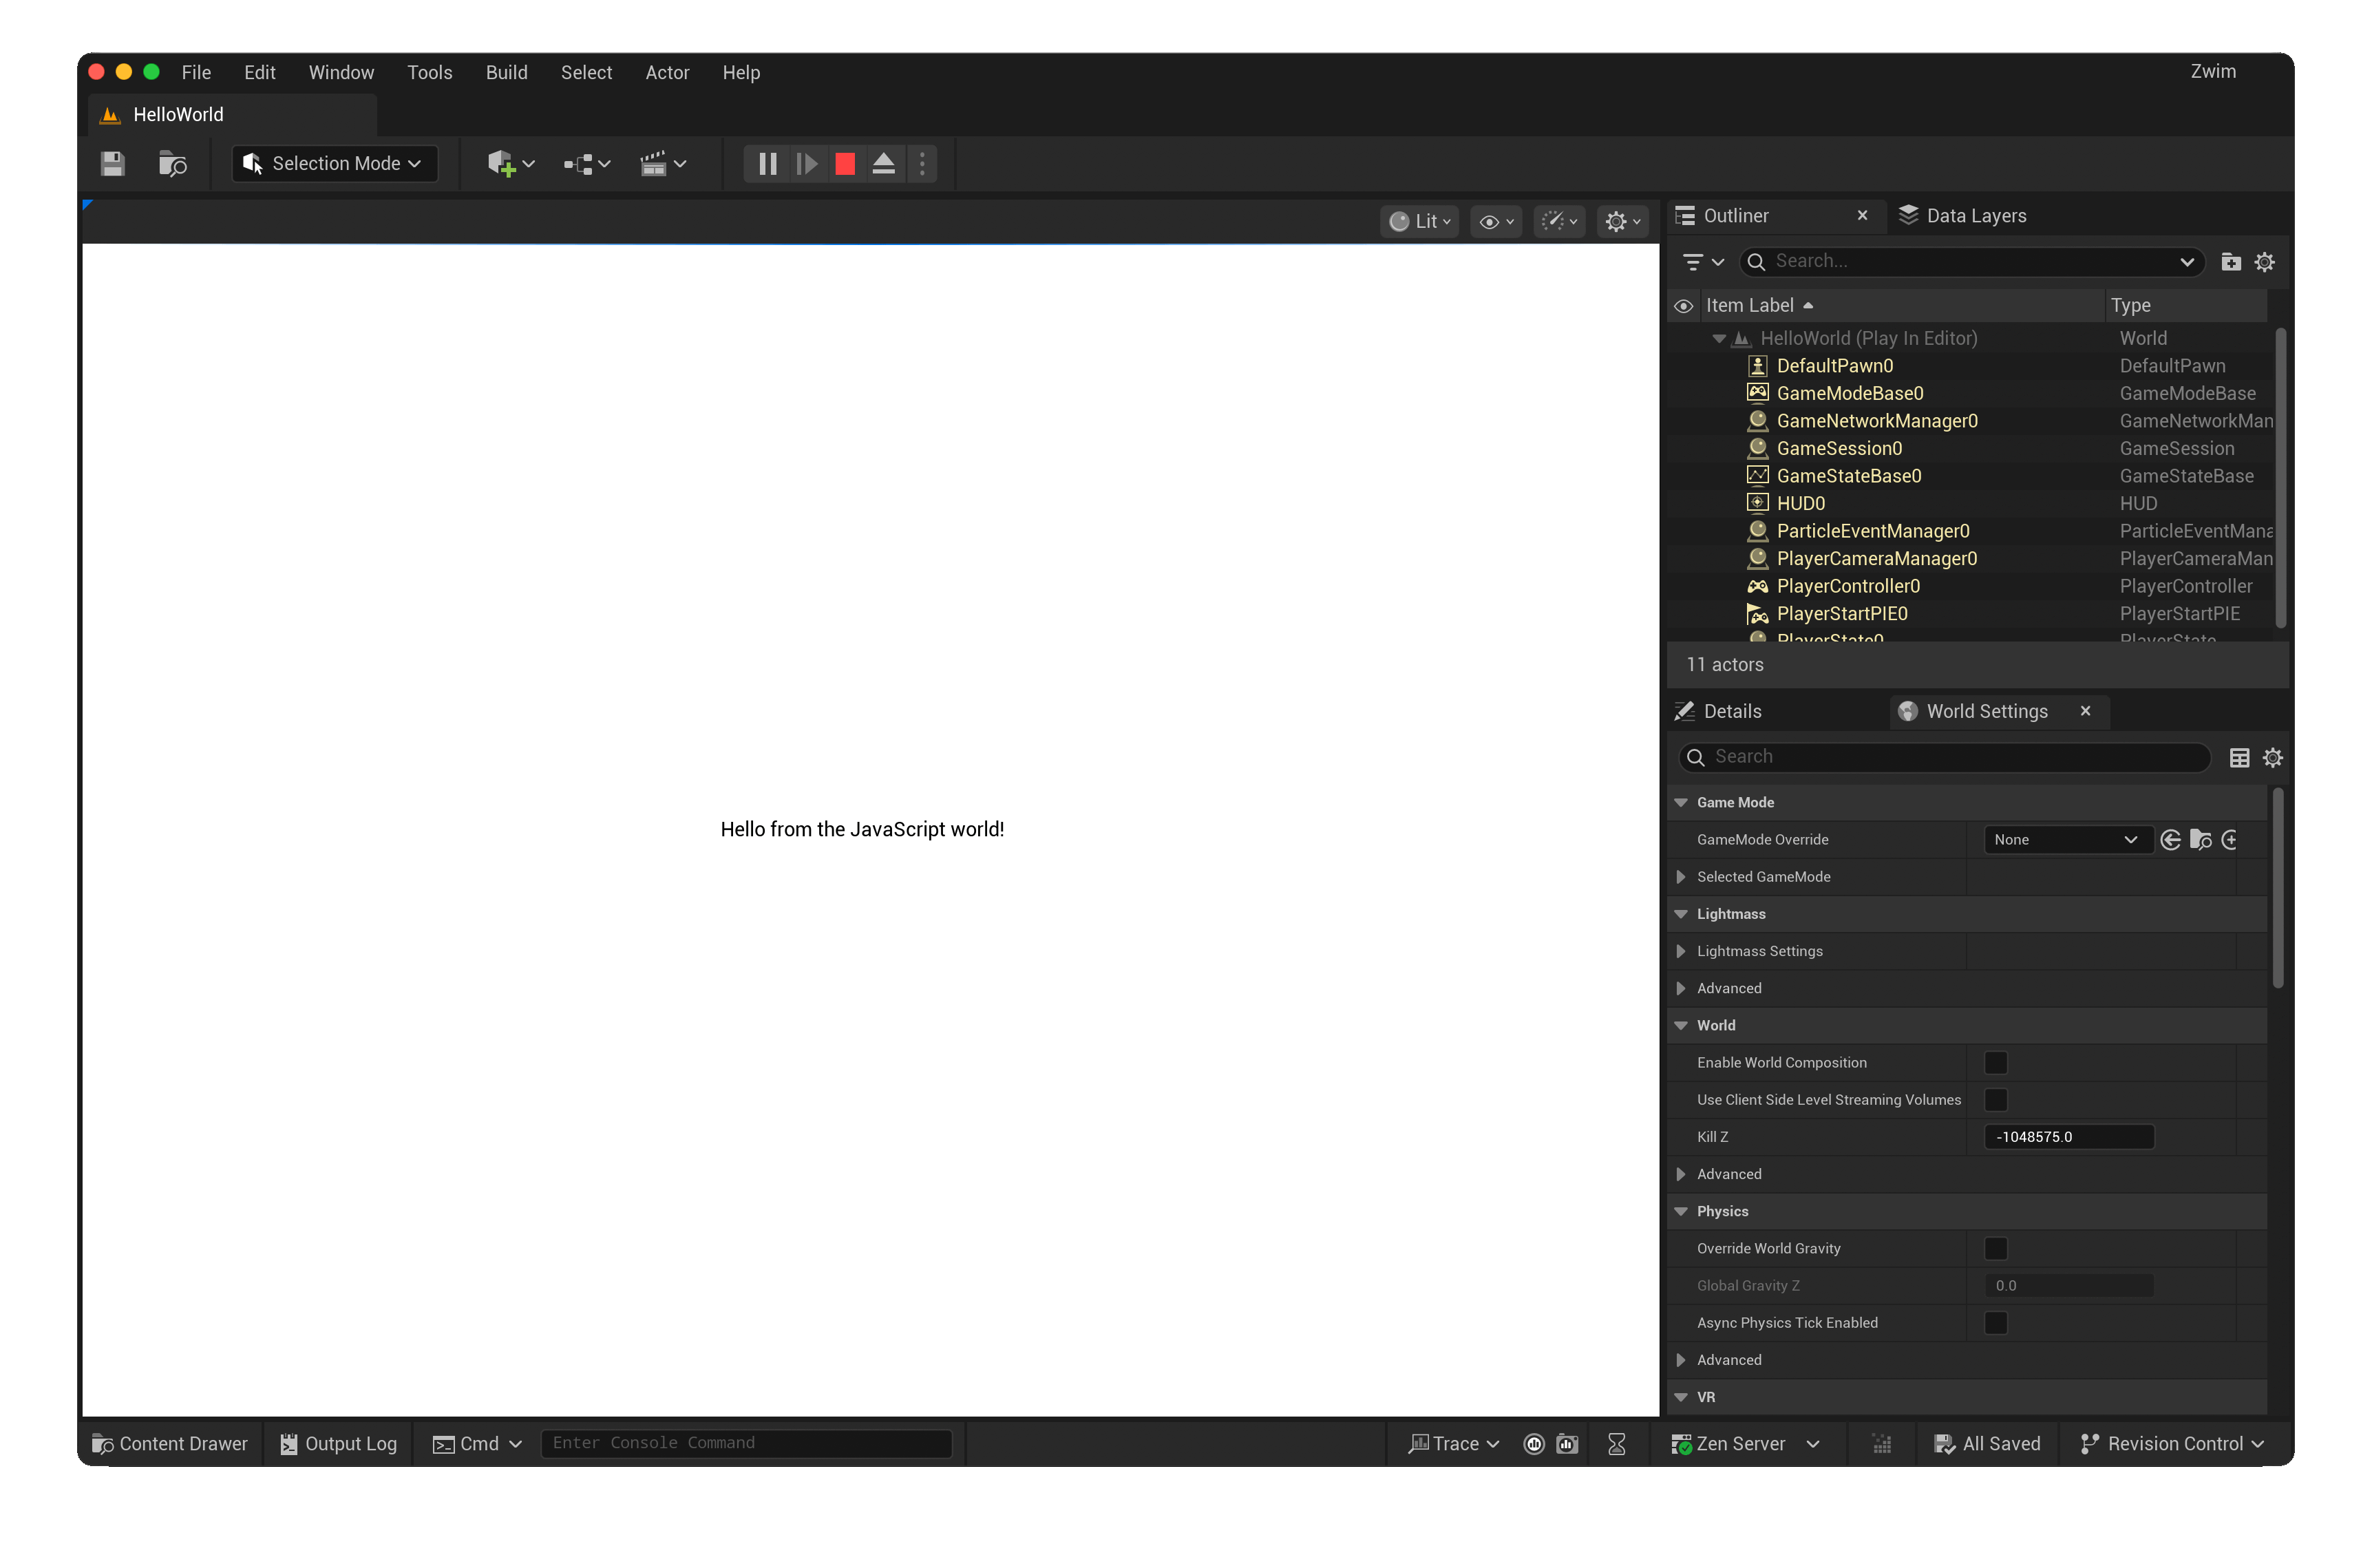
Fig. 3.4Run the game You did it!
Congratulations! You have successfully created your first React Native for Unreal Engine project! 🎉
You can learn more about the inner workings of rnue by reading the architecture documentation.